DIY Whistle

The Ultimate On-Line Whistle Community. If you find one more ultimater, let us know.
User avatar
Feadoggie
Posts: 3940
Joined: Mon Feb 14, 2005 11:06 pm
antispam: No
Location: Stout's Valley, PA, USA

Post by Feadoggie »

braccio wrote:I am having some trouble flexing the 30 mm section of the windway cover enough for it to snap over the main pipe. Has anyone come up with a way to do this?
This is great that so many folks are making their own whistles. I've been at it for a few years now. For those of you in the US using 1/2" CPVC schedule 80 hot water pipe (the off white stuff) that are having issues with Guido's suggested mouthpiece configuration, I have a few solutions you might want to try.

That pipe is designated CTS or copper tubing size for good, if not obvious, reasons. The outside diameter matches the size of traditional copper plumbing fittings. So you can use a copper coupler meant for joining pieces of 1/2" copper water pipe. It fits nicely right over the cpvc. There are two types of couplers. One has a dent in the middle clearly visible on the outside which serves to limit the insertion length of the two copper pipes it is designed to join. You can use those but may have to file the dent on the inside, your choice. The second type has no dent, works like a charm

The second suggestion is to use 1/2" schedule 40, 600 psi, pvc pipe as the outer mouthpiece. It has an inner diameter of 5/8", the same as the outer diameter of the cpvc. You may want to take a short piece of your cpvc with you to the hardware store to do a test fit. The internal diameters of this pipe can vary, the outside diameters are what is standardized.

My third suggestion is to go to a hobby shop which sells K&S brass tubing. The 21/32" size fits right over the cpvc too. If that size is not in stock, you probably have another whistle maker in the area.

A fourth suggestion is to use a cpvc pipe coupler. They have a ring inside which again limits the insertion distance for joining pipes. That can easily be drilled-out with the appropriate sized drill bit. I use forstner bits for this. Make sure you clamp the work piece so it doesn't spin as you drill. Cpvc heats up fast, stinks (probably kills brain cells too) and can cause some calamity if you aren't careful.

By the way, all of these can also be used as couplers for two piece whistles as well. Not the best choices for tuning slides though as the wall thickness of the pipe can leave a significant bore expansion at the point the tubes seperate causing tuning issues (think K&S brass on the inside). Some are more elegant than others.

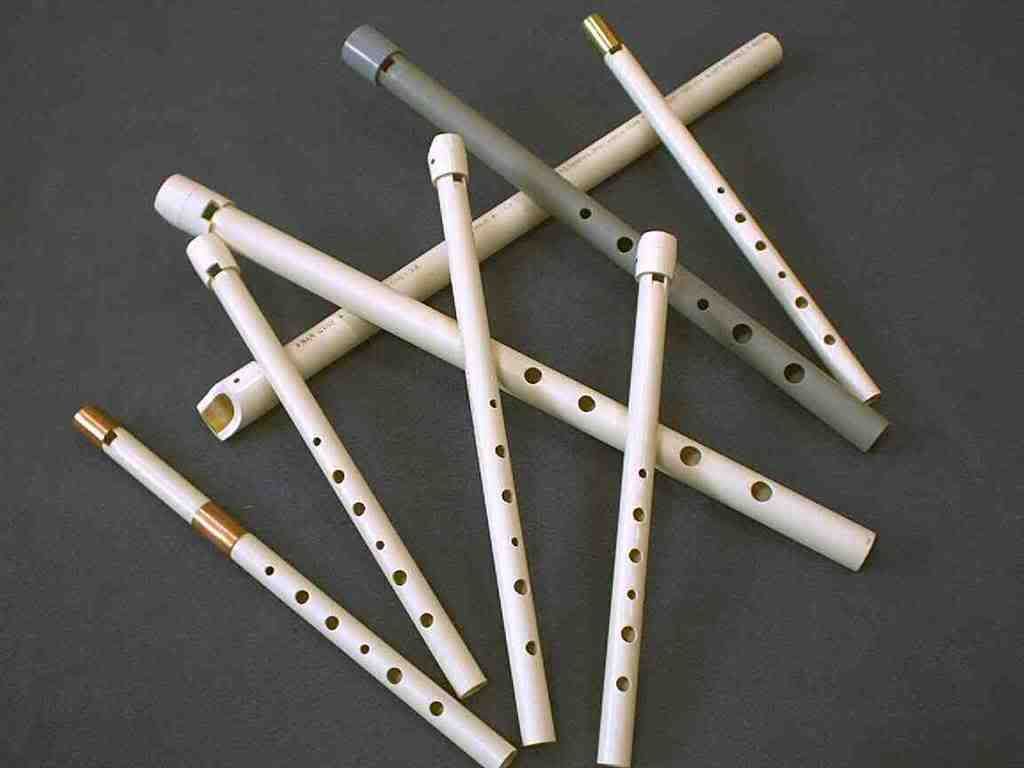
Here is a photo of a few of my early whistles which use those materials.

Image

And remember that cpvc/pvc dust is not a good thing to inhale. Work safe and have fun.

Feadoggie
Last edited by Feadoggie on Mon Mar 03, 2008 5:05 pm, edited 1 time in total.
I've proven who I am so many times, the magnetic strips worn thin.
User avatar
narrowdog
Posts: 661
Joined: Mon Jul 23, 2007 7:10 am
antispam: No
Please enter the next number in sequence: 12
Location: On the system.

Post by narrowdog »

Thanks Feadoggie for the link to your pics, they look good :)

I've just finished a new High D this afternoon, I'll post a pic tomorrow.

Its the first High D that I've tuned every tone hole as I went along rather than just following Guidos dimensions. I done it with the Low Ds but not the high,I think it was worth it :D

Thanks Rustman for the hairdryer tip, its given me some ideas :D
Makes the brain boil this time of night :boggle:

:sleep:
Happiness is taking things as they are.
User avatar
rustman
Posts: 33
Joined: Mon Jan 21, 2008 1:44 pm
Please enter the next number in sequence: 1
Location: Finland
Contact:

Post by rustman »

Hello!
I ended up making an aluminium fipple cap for my aluminium C. I'll try to put some pictures shown, now. Also in the pics you can see my copper D with plastic fipple cap.

http://s245.photobucket.com/albums/gg75/rustman_photos/
"The bigger the better, in everything." - Freddie Mercury
Plastiman
Posts: 57
Joined: Tue Nov 27, 2007 5:46 pm
Please enter the next number in sequence: 1
Location: Queensland, Australia

Pretty whistles

Post by Plastiman »

Very handsome whistles Rustman!! How did you fix the aluminium windway cover on? You'l have to post some soundclips next,
Cheers,
Ian
User avatar
rustman
Posts: 33
Joined: Mon Jan 21, 2008 1:44 pm
Please enter the next number in sequence: 1
Location: Finland
Contact:

Post by rustman »

Thank you very much. With some polishing you will get amazing results :P

I made the fipple cap from a little bigger tube. Cut the proper length first, then I saw off a slice from the side of it, pressed it gently in shape in a vice and voila! You must be careful when you press it or it will go off shape. Also the cap must be tight. I used a screwdriver to force the fipple to its place (with plug in the whistle).

After that made the first sound tests and made the tuning the way Guido adviced.

When I got the tuning right, I drilled a small (0,35 mm) hole at the side of it (with plug in the fipple) and stick a small brass nail through the hole. This keeps the fipple from moving while shaping the fipple. Then I saw the fipple's final shape and filed it smooth ( Dremel tool helps). After this I used smooth sandpaper (with water) to every surface of the whistle and sanded off all scratches and small dents. I also rounded the edges of the fingerholes to make them easier to feel under fingers.

After this comes the most pleasing stage, polishing. I took the fipple cap and plug off and put a polishing wheel to my drill with fast speed, added some polishing wax and polished the thing "mirror like".

Then I washed the metal parts with soap and water, beeswaxed the fipple and put the whistle together.

Yesterday I started to make a pair to my aluminium, D this time. :lol:
"The bigger the better, in everything." - Freddie Mercury
Plastiman
Posts: 57
Joined: Tue Nov 27, 2007 5:46 pm
Please enter the next number in sequence: 1
Location: Queensland, Australia

Whistlemaking

Post by Plastiman »

Ahh sooo, all is revealed Glasshopper,
I never cease to be amazed at the ingenuity of my fellow humans. I am sure that there are at least as many ways of doing anything at all as there are people doing them.
Nice one Rustman, sound clips next?
Cheers,
Ian
braccio
Posts: 45
Joined: Thu Feb 14, 2008 2:47 pm
Please enter the next number in sequence: 1
Location: Carmel Valley, CA

Post by braccio »

Let's hope that this works.

Here is a shot of my first attempt. I have to clean up some of the rough bits on it yet, but it sounds good. Now, I just have to learn how to drill in a straight line.

Pete


Image
User avatar
Silvano
Posts: 132
Joined: Sun Jan 15, 2006 6:18 am
Please enter the next number in sequence: 1
Location: switzerland
Contact:

Post by Silvano »

braccio wrote:Now, I just have to learn how to drill in a straight line.

Pete
:lol: This happend to me too when I was in a hurry. I learned to check the position of the tube and the drill bit before drilling.
Beside this it looks really nice. Is this a CPVC tube?

Silvano
--- A whistle a day keeps bad thoughts away ---
braccio
Posts: 45
Joined: Thu Feb 14, 2008 2:47 pm
Please enter the next number in sequence: 1
Location: Carmel Valley, CA

Post by braccio »

Yep. This is 1/2 inch CPVC tubing.

Here is something interesting. I started the length longer than Guido suggested and then trimmed down to the base pitch of the whistle (D). I then measured the length from the window to the end and I was spot on the measurement that Guido gave in his write-up (264 mm).

Pete
User avatar
Silvano
Posts: 132
Joined: Sun Jan 15, 2006 6:18 am
Please enter the next number in sequence: 1
Location: switzerland
Contact:

Post by Silvano »

Well, since the lenght is affected by the bore, the wall thickness and the dimensions of the window this is pretty a normal result when you have a tube of the same dimensions and you build your window after Guidos instructions.

Silvano
--- A whistle a day keeps bad thoughts away ---
braccio
Posts: 45
Joined: Thu Feb 14, 2008 2:47 pm
Please enter the next number in sequence: 1
Location: Carmel Valley, CA

Post by braccio »

Well, that was the interesting part. The wall and bore dimensions for the pipe I was using were close but not equal to Guido's measurements. I expected to see some variation due to this but the differences must have canceled out.

Pete
User avatar
Silvano
Posts: 132
Joined: Sun Jan 15, 2006 6:18 am
Please enter the next number in sequence: 1
Location: switzerland
Contact:

Post by Silvano »

braccio wrote:Well, that was the interesting part. The wall and bore dimensions for the pipe I was using were close but not equal to Guido's measurements. I expected to see some variation due to this but the differences must have canceled out.

Pete
Either this, or the differences are small enough just having no effect to the lenght. Interesting.

Silvano
--- A whistle a day keeps bad thoughts away ---
User avatar
devondancer
Posts: 1000
Joined: Sat Dec 29, 2007 12:42 pm
antispam: No
Please enter the next number in sequence: 10

Post by devondancer »

This is so great. You people have so many ideas, and I want to try them all ! All day at work I was drawing fipples in my mind, and trying to solve problems, and planning new whistles. (I don't think my patients noticed!!) I think WHOA is completely gone, replaced, as I was warned, by the need for lathes, milling machines etc. Must go - whistle to tune . . .
User avatar
narrowdog
Posts: 661
Joined: Mon Jul 23, 2007 7:10 am
antispam: No
Please enter the next number in sequence: 12
Location: On the system.

Post by narrowdog »

[quote="braccio"]. Now, I just have to learn how to drill in a straight line.

Pete

Just a thought on drilling ing a straight line,
when you draw your centre line on the pipe don't try doing it with a ruler,it slips all over the place :(
Place the pipe in the corner of a door jam and use that as your straight edge.
Its straight, handy (we all have doors I think :o ) and your pipe dosen't slip around :D

Hope this helps

Cheers
Happiness is taking things as they are.
User avatar
salty dodd
Posts: 7
Joined: Mon Aug 25, 2008 8:10 am

Post by salty dodd »

Hey, everybody.

I’ve been lurking for a while, tried to get in a short while back, and had to contact the administrator to have my account re-setup.

I’m impressed by all of your work; very beautiful.

I’ve made a copper D whistle, and am happy with it.

The second fipple was a winner after messing the first one up.

I used Fulton’s destructions. I am now hooked.

The wife, Salty Dawn, likes the lower octave of the D whistle, but when I play in the upper octave, it bothers her, she calls it a shrill.

I thought maybe a low D would bring that “shrill” out of my playing.

My question is this.

I have been attempting to do a low D copper whistle, but now after two fipples, the low D sounds like the regular D pennywhistle. Not low.

The second fipple with shorter hole does sound the low D, but with very little breath being blown across it, (not very loud). It doesn’t take much more breath to bring it up to the regular D.

Any insights on what I may be doing wrong?
Best,

Salty
Post Reply