I have been spending some hobby time making soprano D copper whistles, mostly following Kim Fulton Bennett's directions (http://www.geocities.com/SoHo/Lofts/6611/makewhis.htm). I have made three pleasant-sounding whistles that are well in tune in the lower octave and up to around F#. My problem is that the upper part of the second octave, G and above, takes too much air on all three. I have to blow so hard to be in tune that the upper notes become screechy, or if I play with normal air pressure, I end up 40-50 cents flat. In other words I have to blow harder to be in tune than I would on my Syn, Serpent, Hoover or Susato whistles. And the upper register is slow to respond.
I'm not planning to sell any whistles, but just have fun. I know that straight bore instruments will always have some flatness in the upper register. (I have seen on some makers' web pages that one can make perturbations to the bore to bring the upper register into better tune. I am NOT interested in going that far.) But somehow others have found the trick to adjust the fipple so that their straight-bore instruments are better in tune up high than mine. Pushing the fipple block farther in doesn't help all that much— like I expected based on my flute experience. Can someone give me some clues?
Thanks,
Phil
Fipple adjustment question for whistle makers
Give us some measurments and the key of your whistle. What is the size of the window? What is the distance from the end of the windway to the blade?
I made an experimental fipple plug to study the lower chamfer. The floor of the plug must be glass smooth. Cut the corner off the end that goes to the window. Then put some non hardning clay there. Now the plug can be pushed in or out and try some differant lower chamfers in the clay with immediate results. I use a wet Xato square blade to shape it. The wet keeps the clay from sticking to the blade.
A very good picture of the fipple can be found at Jubilee music. www.tinwhistles.us
-
raindog1970

- Posts: 1175
- Joined: Tue Jun 26, 2001 6:00 pm
- antispam: No
- Please enter the next number in sequence: 12
- Location: Sparta, Tennessee
Your fipple probably isn't the problem... the hole sizes and positions given in those instructions are just bizarre.
Use the output from FLUTOMAT or TWCALC on another tube, and see if that doesn't make a world of difference.
Use the output from FLUTOMAT or TWCALC on another tube, and see if that doesn't make a world of difference.
Regards,
Gary Humphrey
♪♣♫Humphrey Whistles♫♣♪
[Raindogs] The ones you see wanderin' around after a rain. Ones that can't find their way back home. See the rain washes off the scent off all the mail boxes and the lamposts, fire hydrants. – Tom Waits
Gary Humphrey
♪♣♫Humphrey Whistles♫♣♪
[Raindogs] The ones you see wanderin' around after a rain. Ones that can't find their way back home. See the rain washes off the scent off all the mail boxes and the lamposts, fire hydrants. – Tom Waits
-
brewerpaul
- Posts: 7300
- Joined: Wed Jun 27, 2001 6:00 pm
- antispam: No
- Please enter the next number in sequence: 10
- Location: Clifton Park, NY
- Contact:
Your distance from fipple to blade may be too large. I've occasionally made that mistake and had much the same results you have described. Even a tiny error can make a difference.
Try making a whistle with the fipple/blade distance quite a bit too small. File the blade and note how the whistle plays. I'm guessing it will jump from the first to second octaves much too easily, and also be pretty quiet. Now, file the blade down a bit so the distance is greater. Sharpen the blade again and try playing it. Keep going back and forth until it plays the way you like.
Try making a whistle with the fipple/blade distance quite a bit too small. File the blade and note how the whistle plays. I'm guessing it will jump from the first to second octaves much too easily, and also be pretty quiet. Now, file the blade down a bit so the distance is greater. Sharpen the blade again and try playing it. Keep going back and forth until it plays the way you like.
I think one thing that makes those positions bizarre is that the positions are meassured from the bottom of the whistle. Better whistles are made using measurments from the blade.raindog1970 wrote:... the hole sizes and positions given in those instructions are just bizarre.
oops sorry about the double hit.
-
stevetcm

- Posts: 58
- Joined: Tue Sep 13, 2005 10:18 am
- Please enter the next number in sequence: 1
- Location: West Yorkshire, UK
I've been experimenting with whistles for a while now. It seems that getting the second octave in tune is the tricky bit. What works for me is a constriction at the top of the bore. I've managed to make a D whistle that plays in tune throughout by placing a fairly tight fitting thin walled tube about 45mm long just beyond the blade. I've notice that some makers incorporate this extra piece of tubing into the design of the mouthpiece.
-
raindog1970
- Posts: 1175
- Joined: Tue Jun 26, 2001 6:00 pm
- antispam: No
- Please enter the next number in sequence: 12
- Location: Sparta, Tennessee
It had been a good while since I last looked at those instructions, and I just gave them a serious looking over now that I'm at home on my own computer with all my spreadsheets and stuff.
1/2" copper pipe is really too large for a high D whistle, and you'd need much larger holes than the instructions recommend.
Adding tabs to the fipple plug to fill in the 'dead' space to the left and right of the window will help make the second octave easier, but I doubt you'd ever make an easy blowing high D whistle with such a wide bore.
1/2" CPVC is a much better choice for a high D whistle, and I'm sure there are decent instructions for one posted somewhere... though I can't remember any at the moment.
Regards,
Gary Humphrey
♪♣♫Humphrey Whistles♫♣♪
[Raindogs] The ones you see wanderin' around after a rain. Ones that can't find their way back home. See the rain washes off the scent off all the mail boxes and the lamposts, fire hydrants. – Tom Waits
Gary Humphrey
♪♣♫Humphrey Whistles♫♣♪
[Raindogs] The ones you see wanderin' around after a rain. Ones that can't find their way back home. See the rain washes off the scent off all the mail boxes and the lamposts, fire hydrants. – Tom Waits
-
brewerpaul
- Posts: 7300
- Joined: Wed Jun 27, 2001 6:00 pm
- antispam: No
- Please enter the next number in sequence: 10
- Location: Clifton Park, NY
- Contact:
I'm not so sure about that, Gary.. The I.D. of my own whistles is 1/2", and Parkhurst, Celtic Dead and others use 1/2" copper quite nicely. I think there are two different types of copper pipe with letter designations , btw.raindog1970 wrote:1/2" copper pipe is really too large for a high D whistle, and you'd need much larger holes than the instructions recommend.
-
raindog1970
- Posts: 1175
- Joined: Tue Jun 26, 2001 6:00 pm
- antispam: No
- Please enter the next number in sequence: 12
- Location: Sparta, Tennessee
1/2" copper pipe isn't really 1/2"... the O.D. is 5/8" the I.D is 9/16" +/- depending on the type.brewerpaul wrote:I'm not so sure about that, Gary.. The I.D. of my own whistles is 1/2", and Parkhurst, Celtic Dead and others use 1/2" copper quite nicely. I think there are two different types of copper pipe with letter designations , btw.raindog1970 wrote:1/2" copper pipe is really too large for a high D whistle, and you'd need much larger holes than the instructions recommend.
That's in between the bore size of a Generation C and a Generation Bb... you can make a D tube with it, but it's really too large.
Regards,
Gary Humphrey
♪♣♫Humphrey Whistles♫♣♪
[Raindogs] The ones you see wanderin' around after a rain. Ones that can't find their way back home. See the rain washes off the scent off all the mail boxes and the lamposts, fire hydrants. – Tom Waits
Gary Humphrey
♪♣♫Humphrey Whistles♫♣♪
[Raindogs] The ones you see wanderin' around after a rain. Ones that can't find their way back home. See the rain washes off the scent off all the mail boxes and the lamposts, fire hydrants. – Tom Waits
-
brewerpaul
- Posts: 7300
- Joined: Wed Jun 27, 2001 6:00 pm
- antispam: No
- Please enter the next number in sequence: 10
- Location: Clifton Park, NY
- Contact:
-
Oreo

- Posts: 87
- Joined: Fri Sep 02, 2005 8:37 pm
- antispam: No
- Please enter the next number in sequence: 8
- Location: Siloam Springs, AR
Thanks for the replies!
Hi Whistle Makers,
I thought for the sake of completeness I would add answers that I received from others via e-mail.
I got Mack Hoover's answer first, and it was most helpful because it came with just the information I needed at just the right time.
(Mack's site is http://home.bresnan.net/~mackhoover/)
Here's what Mack said:
The only problem is that I have had trouble getting to get Flutomat to work. Today it crashed with the values I put in. Bill's second response:
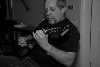
I have been keeping the top flat, with no "beak," and I play these with the fipple at the back. So in the picture here, I am showing the front and back on two copper pipe whistles, and the fipple of my conduit whistle. The other whistle is the Village Smithy, which I modified to make tuneable. (After viewing use your browser's back button.) http://www.sweetums.net/oreo/whistlesIMG_2043.jpg (How does one post pictures on this board?)
Thanks to everyone for the helpful comments and encouragement. I'm still not satisfied with the sound of my whistles. I needed to move the block forward and make the windway deeper. The upper register is better in tune, but the sound still is a bit too bright in the upper register.
Phil
I thought for the sake of completeness I would add answers that I received from others via e-mail.
I got Mack Hoover's answer first, and it was most helpful because it came with just the information I needed at just the right time.
(Mack's site is http://home.bresnan.net/~mackhoover/)
Here's what Mack said:
I was already using a slit-in-the tube method, like Guido above, Silkstones and Syn Whistles. I have found that Mack and Guido are right. It is easy to produce a playable whistle with that method. Another well-known maker allowed me to post his helpful reply, but wished to remain anonymous:Hi Phil,
That site does a good whistle, but fine adjusting the fipple is not as easy as Guido's method.
http://profs.sci.univr.it/~gonzato/index.html
He uses PVC, but it works as well with copper. The plug doesn't need to be flattened and the labium isn't so fussy.
I started using that method, but found that Paul Woodward of Silkstone was using it so I took off in my own direction. There weren't quite as many budding whistlemakers then. Now almost all of them are going that route.
Then I got two fantastic replys from Bill Whedon, the maker of Serpent Whistles (Serpentmusic.com). (I recently got a Village Smithy-- a bold-sounding whistle with nice, traditional breathiness in the tone. I had to train myself to take bigger breaths to play this whistle.) Here are Bill's comments:Hi Phil,
good to see that you are pushing the boundaries of your whistle enthusiasm. There are some critical dimensions that affect that windiness and lack of response in the upper octave. Look at your windway depth first, it should be 1.0 to 1.2mm deep, if you can vary that while keeping everything else constant you might find a sweet spot. If that doesn't work, try changing the size of the window. Much trial and error I'm afraid, but don't give up, it only took me about 15 years to get to the stage I'm at now, and I'm still learning!
Cheers!
Hi, Phil,
Glad you're getting on with the VS! I'm in Ashland City TN right now, getting ready to head for Atlanta at the end of the week. Heaven only knows what'll happen from there.
My best advice to you is to lose the dimensions and percentages from most of the Web whistle designs, and instead to use a combination of empirical testing, and the Flutomat Javascript flute/whistle calculator from Peter Kosel.
http://www.cwo.com/~ph_kosel/flutomat.html
Here's what I do in designing any new whistle:
1. Cut a piece of tubing more than long enough to give you your bell note.
2. Build your fipple and tweak it until you can get clean notes in 3 octaves of bell
3. Trim the tube to give you your precise bell note
4. Run Flutomat and get the hole placement and diameters
5. Measure precise placement with dial or digital calipers.
6. Drill and play. Should be good.
For soprano D whistles, I use 3 diameters of drill (where [] is the window):
[] o 0 0 o O 0
o = 3/16 = 0.1875
0 = 1/4 = 0.25
O = 5/16 = 0.3125
You can check these on the VS and I think you'll find them accurate. And you already know how to make them tunable once the whistle is right.
The only problem is that I have had trouble getting to get Flutomat to work. Today it crashed with the values I put in. Bill's second response:
Wow! (What's an automatic center punch? Has someone come up with one you don't have to hit?) At those prices I'm going to come up with some tools! I'm still putting the pipe in a crack of our deck and putting one foot on it while I drill.Hiya, Phil,
Tell everyone at C&F I said "hello from my travels" too.Life is hectic, but always interesting. Here's a bit more whistle lore, more specific to help you get the placements...
Once you have your fipple working well, and the bell note is right on, here's what you do: First and foremost, wear safety glasses when working with drills. I've seen them bind and shatter, throwing splinters of metal. Don't risk your eyesight.
1. Using a straightedge, draw a line down the center of the tube from the window to the end.
2. Set your calipers to the measurement specified in the Flutomat table for the bottom hole on the instrument
3. Hold the calipers such that you can measure from the bottom (bell) end of the tube up toward the window, and mark across your centerline at that measurement point
4. Repeat for the rest of the measurements in the Flutomat table
5. Using an automatic center punch, or a manual center punch and light hammer, put indentations in the tube where the marks are crossing.
6. Clamp the tube in a vise with the marks on top. Don't try to hold it by hand while drilling the holes.
7. If you have a drill press, just center each mark in turn under the spindle and drill a small (1/16 inch diameter) pilot hole at each mark. If you don't have a drill press, you will have to be extra careful in maintaining center as you drill.
8. Using the pilot holes as a centering aid, increase the drill bit size by 1/16 inch each step, and drill the holes out to the calculated diameters.
9. Using a machinist's scraper or other deburring tool, remove any sharp edges or slivers of metal from both inside and outside of the holes.
That's about all there is to it. A drill press is an almost indispensible aid to accuracy in this sort of work. If you can get one, plus a drill press vise, and a clamp to hold things in place, you've got the beginnings of a whistle factory. Both Harbor Freight Tools and Cummins Tools sell benchtop 5- and 12-speed drill presses for under $50, and they're more than adequate to the job.
http://www.harborfreight.com
http://www.cumminstools.com
Both also sell drill press vises. Cummins has a "cross slide vise" that would probably be ideal for maintaining alignment when drilling your holes. It's $19.99.
See? You can make yourself your own small-scale whistle factory for less than half the cost of some whistles! Hey, it's how I got started!
Best wishes,
Bill Whedon
I have been keeping the top flat, with no "beak," and I play these with the fipple at the back. So in the picture here, I am showing the front and back on two copper pipe whistles, and the fipple of my conduit whistle. The other whistle is the Village Smithy, which I modified to make tuneable. (After viewing use your browser's back button.) http://www.sweetums.net/oreo/whistlesIMG_2043.jpg (How does one post pictures on this board?)
Thanks to everyone for the helpful comments and encouragement. I'm still not satisfied with the sound of my whistles. I needed to move the block forward and make the windway deeper. The upper register is better in tune, but the sound still is a bit too bright in the upper register.
Phil